|
| |
  
|
|
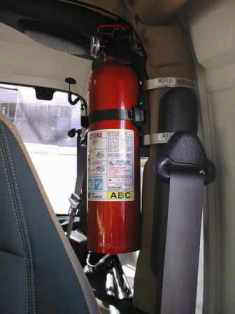
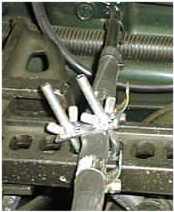
Fire extinguisher: This is
how I mounted mine. It's a Kiddie ABC and cost about $10. As you can see, I simply used
two hose clamps and attached the provided holder to the roll bar behind the driver. I
suggest that you attach the extinguisher to the holder first. If you don't, it will be
very hard to close the plastic strap. Advantages: Easy
to see and reach from all seats.
Disadvantages: Increases the "blind spot" on the driver's side. |
|
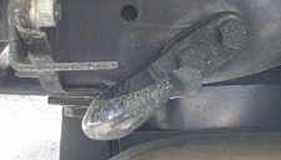
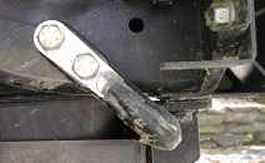
Rear tow hooks: There are
many sites with detailed instructions on this. I will just add a few points to the details
on this site. The hole for
the bottom bolt exists. You need to drill the hole (1/2" diam.) for the top bolt. The
hook should pointing back rather than down, but not so much that you can't get a strap
into it. Put the hook on with the bottom bolt and use a china marker to place the top hole
Use a punch tool to start. Use a smaller diameter drill bit first, then go to the
1/2". Finally, be sure the bolts for your tow hooks are no more that 2" long.
Any more and you can't get a box wrench on (or off!) when tightening the nut. Here's a BIG
tip: Use a lock washer and hand tighten the nut. Do NOT use lock nuts (some hooks come
with them!). Fitting a box wrench (1/4") in the hole found under the frame is
possible, but not easy. Tightening a lock nut is a a nightmare. Advantages: Minimal effect on departure angle. Much stronger than
using a trailer hitch device (most are rated at 2,000lbs or less).
Disadvantages: Possible rubbing and wear of strap on bumper. Possible lift of bumper
resulting in less traction? |
|
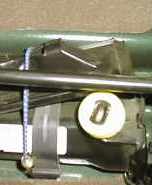
A Hi-Lift jack can get you
out of some tough spots. It can also be used as a hand-winch if you have the right chain
and straps. I put my 48" under the hood. Cost less than $10 and was easy. Here are
the detailed instructions rockcrawler.com
(go to the archives and then recovery gear) On the site, the sizes are a bit strange,
but I used 2 small u-bolts, 4 wing nuts and star lock washers, and 4 small hose clamps to
help keep it in place. Hopefully, this picture along with the two below are worth a
thousand words. If not, e-mail me! |

|
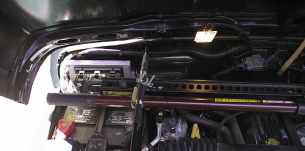
Hi-lift continued. Here you can see the total
length. It will take a bit of trial and error to get the jack head in the right place.
Mine is about 1' from the bottom. Make sure you cover the battery teminals to prevent an
accidental short should it fall. The footplate fits nicely under the passenger seat (see
above) with the stock jack. I should cut the u-bolts to be a bit shorter...evenutally. Advantages: Keeps it out of the way and clean.
Disadvantages: Can get hot, takes a couple of minutes to get it in and out. |
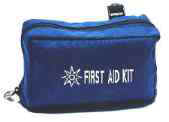 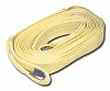 |
Simple. Don't leave home without these. For
yank straps, make sure that there are loops on the ends and no metal hooks. Minimum size
should be 2" x 20 feet. I've banged my knuckles enough times to appreciate the
Band-Aids in the first aid kit! |
|
